
This is the last part of my Autumn Owl Canvas.
I left you last time with simply the owl to make to finish it off
Here is what you will need for part three
1 Brown Fabric - felt or cotton are two good choices for your owl
2:Embroidery Cotton
3: Brown Felt
4: two small buttons for eyes
5:your template
6: a small amount of stuffing. I used pure wool but you could use anything that is soft.
Step one is to design your owl. I did a load of quick sketches but settled on this one

Step two is print out your template. You can use this one or design your own. The owl is approx 2" and a bit high.


Cut out your fabric

Pin to your canvas just above the branch

Using your embroidery thread stitch around 3/4 of the owl leaving a space at the bottom

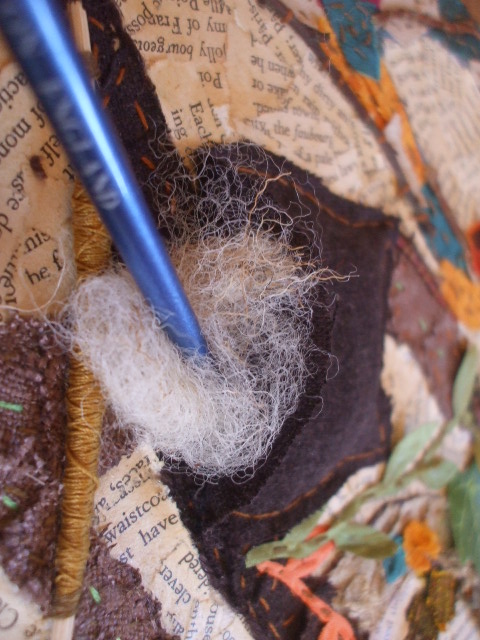
Gently stuff your owl. I used the end of a paintbrush to stuff the ears
Stitch him all the way up


The next task is to embroider two small circles for his eyes

Add your button eyes and a small triangle for his beak. You can also add eyebrows and feather ears

Now for his tummy.
Embroider a zig zag stitch across the top of his tummy, just below his beak.
Now stitch at an angle from left to right using the zig zag dashes as a guide

Now stitch right to left to create across hatch diamond pattern

Now for his wings.

Now stitch right to left to create across hatch diamond pattern

Now for his wings.
Cut the wings out of the same fabric (or different to create a unique breed )

Stitch them with an x stitch just at the sides


Now for his feet
Start by stitching a couple of stitches from the bottom of his body to the top of the branch

Now stitch three stitches each claw from the top of the branch into the cotton that is wrapped around the branch and into the canvas

Finished Claws

This is my finished Owl

One Finished Canvas
He is now ready to adorn your wall or wrap up and give as a present


No comments:
Post a Comment