The transfer for her face appears to have been a success. The first time it didn't work because I took the instructions too literally ' cover the image in a thick layer' I ended up with a huge blob of gunk on the fabric that peeled off. The second time I used less fluid and whilst the fabric is still slightly stiff I have managed to clear off all the paper. I now need to wait for it to dry and make her head.
Showing posts with label mermaid art doll. Show all posts
Tuesday, 1 November 2011
Monday, 31 October 2011
Mermaid Art Doll project #6 - Possible breakthrough for her face
Now I haven't forgotten my mermaid doll but I have been struggling to get her face right. I have tried a load of the types of faces suggested by doll sites but I just can't seem to get the knack right. I am hoping that the next attempt will prove sucessful enough for me to finish her.

I have purchased a tube of Dylon image maker with the hope of sucessfully transfering a face design to fabric. I have used thE image on the right as I want to do her hair myself and last night I printed it out, lathered it in transfer fluid, placed it on the fabric and left it till this morning and am praying that it works.
I have nothad much sucess with this product before and if it doesn't work then I may have to go back to the freezer paper method.
Saturday, 13 August 2011
Mermaid Art Doll project #5 - Wings - a mad burst of creativity
A mad burst of creativity yesterday has resulted in my mermaid's wings cut out, stitched up and half decorated in the space of about an hour. Thankfully I had my wits about me enough to actually take some photographs whilst I was doing it.
I had been looking at a wonderful book called 'The Birth of Dragons' and it had such wonderful illustrations that it kicked off my muse.
I started out with a simple hand drawn paper template that I cut out in two layers, one of strong whtite cotton and one of muslin.
these are my two wings all cut out, edge stitched and ready to work on
I had been looking at a wonderful book called 'The Birth of Dragons' and it had such wonderful illustrations that it kicked off my muse.
I started out with a simple hand drawn paper template that I cut out in two layers, one of strong whtite cotton and one of muslin.
I then stitched around the outside to secure and form my tattered couture edge
these are my two wings all cut out, edge stitched and ready to work on
Friday, 29 July 2011
Mermaid Art Doll project part 3
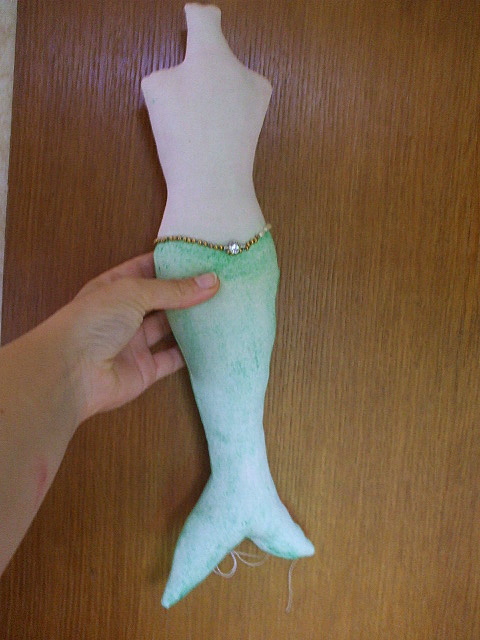
Today I've been working on my mermaid's tail.
I then began to wrap some gold net around the top of her tail and wrap stitched some gold bead ribbon in an organic style over it


I suddenly realised that what I had had in mind all the time was Klimt, not that it was a direct inspiration but an idea nagging at the back of my mind. She's not going to be a Klimt Art Doll but its certainly one of my inspirations. I think she might turn out to be more 1920's/30's with a showtime twist.
I then added a button that was in the bottom of my lace box and a small organza rose.
I then spent half an hour looking at her wondering where to go next. I still don't know so I'm taking a break from her till sunday as its Thame County Show tomorrow so that should be lots of fun
Labels:
gustav klimt,
Klimt Art Doll,
mermaid,
mermaid art doll,
part 3
Thursday, 28 July 2011
Mermaid Doll project #2
Second part of my Mermaid Art DolL pROJECT
This her body all stuffed and stitched up, she measures 16" from her tail to her neck and her head is 3" long

This is the basic embroidery of her face, I did try painting it with pens and fabric paint but the less said about the better.
This her body all stuffed and stitched up, she measures 16" from her tail to her neck and her head is 3" long

This is the basic embroidery of her face, I did try painting it with pens and fabric paint but the less said about the better.
Labels:
mermaid,
mermaid art doll,
soft sculpture
Subscribe to:
Posts (Atom)